Andy Latto is a very competitive gamer. Beating him at Thurn & Taxis was when I knew I understood the game. Having him win a game that you are teaching him is no longer a surprise. Andy is also generous with his time and talent to the hobby. Andy is the Game Master for the Thurn & Taxis tournament at the World Boardgaming Championships every year. To keep track of his tournament, Andy created a Google Sheets spreadsheet to register and track entrants in the tournament. He has, generously, shared it with other GMs and I will be using it for the 2nd time for my Puerto Rico tournament at WBC this year.
Along with other clever programming throughout, Andy implemented his tie-breaker rules for advancement. As part of the documentation, Andy explains why he uses certain tie-break rules. I found that so interesting (and well explained) that I felt compelled to share just that with other folks who may never explore Andy’s GM spreadsheet. So here, in his own words (and with permission), is Andy Latto’s tournament advancement tie-break philosophy. You may disagree, but if you do, I hope your reasoning is as clear as Andy’s.
Thurn and Taxis tiebreak system is as follows:
Each game you play that you finish first or second, you score points as follows:
- Win in first game played: 1500 points plus (your score/second place score)
- Win not in first game played: 1000 points plus (your score/second place score)
- Second place, 4-player game: 100 points plus 10 * (your score/winner’s score)
- Second place, 3-player game: 50 points plus 10 * (your score/winner’s score).
- Top 16 scores qualify for the finals.
This scoring system was designed to fulfill the following goals:
1. Playing never hurts
People should always be encouraged, not discouraged, from playing a game. So I never want to put people in the situation of “I qualify now, but if I play again, and do badly, I might not qualify”. So playing an additional game can only help, not hurt, your qualification score.”
2. Reward achievement, not attendance.
The best players should qualify for the semifinals. Showing up for a heat and finishing last doesn’t show you are a good player; it just shows that you showed up. So points are awarded only for finishing at least average, which in a game with 3 or 4 players, means 1st or 2nd. If you play a heat and finish 3rd or 4th, it doesn’t hurt, but it doesn’t help, either.
3. Scores should only be counted as score differentials.
In many games, a game may be high scoring for everyone or low scoring for everyone, depending on how the game goes. A Thurn and Taxis or Saint Petersburg game with many turns will have higher scores for everyone, but doesn’t mean that everyone is a better player. So the absolute score should never be used in the qualification formula, since it gives an incentive to aim for a high-scoring game, which can be in conflict with the main objective of scoring higher than the other players.
4. Score differentials should be measured by ratios.
If scores are higher, we expect score differentials to be higher, too. So winning 15 to 10 is a more impressive achievement than winning 20 to 15, and should get more tiebreak points. So the tiebreak always measures the ratio of your score to another’s score, rather than a difference. This has the added benefit of producing far fewer ties; since an 18-17 win is just slightly better by ratio than an 18-19 win, exact ratio ties are very rare except when both compared scores are the same.
5. Compare to other good players where possible.
Tournaments will always include some beginners who play poorly and finish with very low scores. The difference in skill, and therefore in score between the best and the worst players can be quite large, and the luck of having a very weak player at your table should not be rewarded. Some luck of the draw is unavoidable, but if we say that it’s unlikely that there will be more than two very weak players at a table, their effect on qualification is minimized if the first player is only compared to the second player, and vice versa, rather than comparing to all players or to an average.
Also, to the extent that one can make plays that target particular other players, I’d rather the first and second player target each other, rather than target the players who are losing, which I think makes a more fun experience for all.
6. Count closeness of seconds as more important than big firsts.
A close second means you did well against a player who won, while a win far ahead of second only means you did well against a player who came in second. There’s less evidence you did well against a good player, so you get fewer tiebreak points.
7. First in a three player game counts as much as first in a four player game, but second in a three player game counts for less than in a four player game.
If first didn’t count as much for three players as four, a player in a three player game would be at a severe handicap in qualifying. A second in a three-player game is easier to achieve than a second in a four-player game, so it counts for less. The fact that you can’t get full credit for a second balances out the fact that it’s easier to get a first.
8. For simplicity, incorporate the HMW (heats: most wins) rules into the formula
Technically, the point formula should only apply if the list of precedence rules for qualification reaches the ‘GM specified tiebreak rule’. But I think it’s easier to understand a rule that says “Add these up; highest score qualifies” than one that says:
“First see who has most wins; then see who has a win in their first heat entered, then…then add these numbers up and see who is highest”
So the size of the bonuses for win in first heat entered, other win, and second place ensure that the standard HMW rules will be followed, with the tiebreak points only mattering in comparing people with the same number of firsts and same number of seconds, and both or neither having a win in first heat entered.
If your tournament is HSW (heats: single win), rather than HMW, so that a win in the first heat entered is more important than two wins, you can achieve this by modifying the points for win in first heat entered to be:
Win in first game played: 5000 points plus (your score/second place score)
Feedback on this scoring system is welcome; email me at andy.latto@pobox.com.
Thanks, Andy, for permission to publish this. If you, gentle reader, have different view, please add it as a comment to this article. If the terminology of tournament structure is unfamiliar, you should read the WBC GM Guidelines at
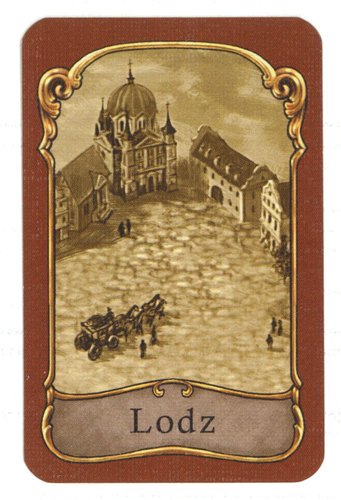 Key Cities and the ‘Around the World’ Bonus Chit – The bonus chit for getting into all colors is an important bonus. Although it’s possible to win without it, the winning player will have one of these chits a vast majority of the time. As a result, the colors with just a single city (Lodz, Innsbruck, and Sigmaringen) are a little more valuable initially. You can also add Pilsen to that list, as it’s the only way to get into Lodz.
 In a four-player game, you’ll generally go through the deck around two times or so, depending on Administrator use. With only 3 copies of each city in the deck, obviously at least one player will miss out on the key cards the first time through. When the opportunity is there, I will try to make sure I’m working on a route that includes a key city when the first shuffle occurs. Better yet, I’ll also be holding another key city in my hand ready for my next route. I’m often willing to take a tempo hit to extend a route one extra turn to keep a card out of the shuffle, especially if another copy is also out.
 On the majority of your turns, you’ll be using either the ‘Draw 2’ or ‘Play 2’ special ability so it’s fair to think of your turn as having 3 actions. Every city in a route costs you two actions; one to draw the card and one to play it. With 20 post offices, you need a minimum of 40 actions, or 14 turns, to be able to end the game that way. However, you are bound to need to hit a couple cities more than once, adding a few turns to that. If a player is rushing to the 7-cart by using the cartwright, turn 14 is also the earliest that the game end can be triggered. The 7-cart is worth 3 points more than the 6-cart, which is over 10% of most winning scores. It’s another 2 points less for the 5-cart. In addition, the first player to acquire a 7 also gets the 1 point bonus for ending the game so if you end the game while still on the 6-cart, you already have 4 points to make up. I point all this out to stress the importance of keeping pace with the cart leader. Although Thurn is not a race game, it often plays out like one. The cartwright ability serves a couple purposes in relation to tempo – 1) It can help maintain pace with the cart leader; 2) It can help you catch up when other circumstances have caused you to fall behind; and 3) it allows you to get away from small routes while still picking up the next cart.
 Don’t be afraid to use the Administrator. I’ve seen plenty of players refuse to (or rarely) ‘flush’ the cards because they consider it inefficient or feel that it just helps the other players too much. On its surface, the administrator does “waste” 1 action, by depriving you of the ability to draw or play a city. However, if the ideal cards aren’t there to draw, you aren’t losing a good action. The alternatives are drawing blind off the top or taking a less desirable card for your route, possibly hitting a duplicate city. The blind draw could get you a completely useless card (for the 1 action wasted as using the Administrator) and leaves you in the same position for your next action. That’s not to say there aren’t times to draw blind as well. If there are several connectors that will work and the deck is low and you’re confident there’s a good chance, then go for it. But also pay attention to what cards your opponents are currently looking for. The flush can be used as a good defensive play, getting rid of someone’s key card while improving your own card selection. Similarly, if I notice that there is nothing on the board that connects to the next player’s route, I may be more likely to blind draw, and possibly put them into a position where they need to flush.
 Aggressions were often defense card checks, especially early in a game. A one point strength lead meant you could either: force a discard of a highly sought after defense card , win the aggression, or make them sacrifice a unit. All of those outcomes were great, so hitting someone hard early was something that was desired – making Caesar the highest ranked leader in Age A. His extra red dot meant more cards drawn, the ability to hit and keep drawing cards, and a minuscule strength lead good enough to hit someone in round 3 with an aggression.
 I use the same formula when determining to attack someone or not. This can change based on the number of defense cards seen, how many of the previous age were used, etc. Due to fewer aggressions overall, people can be assumed to have a previous age defense card as well, but as per every game of this nature, you must make that judgement call based on what has happened thus far in your game. But I do tend to not send aggression to people who are safe-ish based on the above presumption.
 One of the big weaknesses in the old Through the Ages was the Age II tactics lottery. You wanted to have 3 red dots going into Age II to maximize your chance of drawing a classic army, or perhaps a Napoleonic army as a consolation prize. Sometimes you just set up your military for whatever and hoped for any (non-fortification) tactics card. Failing to draw a red card in Age II probably spelled the end of your game.
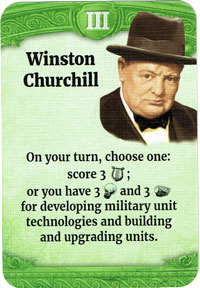 There are ways to shore up your weaknesses if you are unable to pull it all together. Winston Churchil has the ability to make up stone and science. Albert Einstein can keep you topped up with the science needed, provided you can find a Computers card. Yellow cards abound to help make up the stone issues.